Practical and efficient WatchKit tables with view model diffing
May 29, 2015
Hey! This is an old post. It reflects my views and the state of the world in 2015, but is likely to be outdated. You’ll find me
on Twitter, building
Nozbe, and making
engineering blueprints.
In this post, I will show you how to dramatically simplify the architecture of your WatchKit application and improve its performance. We will introduce a thin layer between your interface controller and the views (tables, rows, labels, images…). Together with a small set of additions to the WatchKit framework, this will free you from worrying about updating your UI in an efficient manner. Every time your data changes, you will simply tell the framework what you want to display, and the framework will intelligently compute the smallest required set of interface changes for you.
Sample app
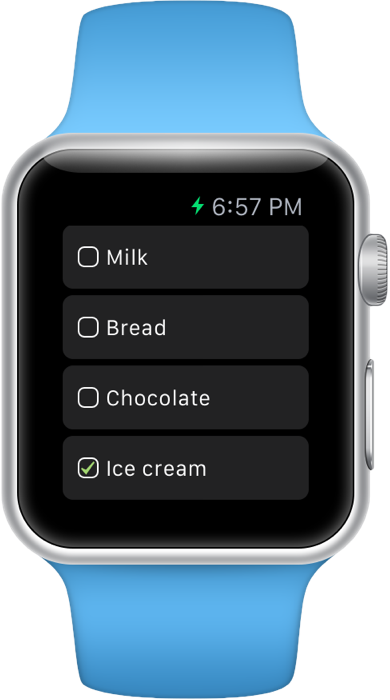
To illustrate the concepts in this article, we’ll make a very simple app — a shopping list. We’ll display it as a table, each row with a name and a checkbox to indicate if the item was purchased. We’ll model those items as a struct:
struct ShoppingItem {
let id: String
var name: String
var completed: Bool
// let createdBy: String
// var updatedAt: NSDate
// var notes: String
}
For the sake of argument, let’s pretend shopping items have some additional properties that aren’t displayed on the list, but would be useful somewhere else. You’ll see why later.
Background
As you know, WatchKit apps are constructed in a very peculiar way — they’re executed on an iPhone, not the watch. All of the UI changes must be sent over the radio, with significant latency and bandwidth limitations. To achieve reasonable performance, we have to minimize traffic between the phone and the watch.
Unfortunately, the WatchKit framework doesn’t help us very much with this. Interface objects are write-only, and don’t know about the state of views they represent. So if we try to update a table with the exact same data it displays, all rows will be updated, wasting precious bandwidth.
We have to add our own layer between the interface controller and the views to remember the displayed state and only send updates to the Watch if anything changed.
The basis for it is provided by view models and updatable interface objects. Those concepts have been explained very well in Reducing WatchKit Traffic With View Models by Robin Senior. If you haven’t read that article, I urge you to read it before continuing. (It’s okay, I’ll wait.)
View models and updatable interface elements
Here’s a quick recap of ideas presented in “Reducing WatchKit Traffic With View Models”:
1. Updatable UI elements
To aid us with updating UI elements, we’ll define some helpers on WatchKit classes, like this:
extension WKInterfaceLabel {
func updateText(from old: String?, to new: String) {
if old != new {
setText(new)
}
}
}
(It would be best if these objects simply remembered their own state, but this is harder to do well than it seems.)
2. View models
We’d like to update whole rows in a similar way, but we first need a data type to describe them. For that purpose we’ll define a view model:
struct ShoppingItemRowModel {
let objectId: String
var name: String
var completed: Bool
init(_ item: ShoppingItem) {
objectId = item.id
name = item.name
completed = item.completed
}
}
Why not just use ShoppingItem? You could. But when the view only displays a subset of model’s data, it might make sense to encapsulate it into a separate type. This way, if the view models don’t change, we know the rows themselves don’t have to change, either.
Another reason to make a new type is when your existing model layer is built using classes, not structs. We really want view models to have value semantics.
(What is a view model? It’s a value (a model) that describes a piece of user interface (a view). Mystery solved!)
3. Updatable table rows
We can now make our table rows updatable easily:
class ShoppingItemRow: NSObject {
@IBOutlet weak var checkbox: WKInterfaceImage!
@IBOutlet weak var name: WKInterfaceLabel!
func update(from old: ShoppingItemRowModel?, to new: ShoppingItemRowModel) {
checkbox.updateImageName(
from: (old?.completed).map(checkboxImage) ?? "checkbox",
to: checkboxImage(new.completed))
name.updateText(from: old?.name, to: new.name)
}
func checkboxImage(completed: Bool) -> String {
return completed ? "checkbox-completed" : "checkbox"
}
}
Notice an interesting thing that happens with the checkbox image. We map the completion flags to checkbox image names, but when we’re setting up a table row for the first time (old is nil), we default the image name to “checkbox”, because that’s what’s set up in Interface Builder. This way, when we display a new row with an uncompleted shopping item, we get the right checkbox image for free.
4. Updating tables with view models
Instead of naively resetting the table by calling setNumberOfRows, and updating each row directly, we can now update tables more efficiently, like this:
- map
ShoppingItems we want to display into view models
- insert/remove rows at the end of the table, if needed
- for each row, get the controller, and call
update with the old and new view model
- save new view models for the next update
Here’s a visual example:

We added one item, completed another one, and the system did the right thing: only updated what actually changed.
Shortcomings
What I’ve described above is a great technique. We can update our table every time there might be some new data, and if there are no changes, we don’t have to worry about it — no bandwidth will be wasted.
The technique is efficient when we change properties of existing rows, or when we add or remove rows from the end of the table. But it’s disappointing whenever the order of rows changes, or when rows are added/removed in the middle of the table. Take a look at what happens when we move the last item to the very top:

Even though all of the data was already sitting in our table, we had to set up everything from scratch. Ugh.
For the human eye, it’s pretty obvious what should have been done in this scenario: “Cookies” should be removed from the list, and then inserted at the beginning. (You can’t reorder table rows in WatchKit.) Everything else should stay unchanged.
Doing this automatically isn’t as simple as it sounds. We need some sort of a diffing algorithm to figure out how we can go from old to new rows in the smallest possible number of steps.
Diffing view models
Let’s define our problem a bit more precisely. Given two arrays, old and new, we want to calculate the smallest possible set of insertions and deletions necessary to align as many elements from both arrays as possible.
What we want to determine first is the longest common subsequence — the largest possible set of elements that exist in both arrays in the same order (not necessarily all next to each other).
Then, we can iterate over elements of the LCS, check for their positions in old and new arrays, and remove or insert rows to align them.

And when I say “align”, I mean we want the common elements to be at the same indexes in both the old array after insertions/deletions are applied, and the new array.
What we don’t care about is elements that are different, but don’t interfere with the alignment of common elements. In the illustration above, “Chocolate” was removed from the list, but “Mayo” was added at the same spot (between the same two common elements). We don’t have to remove that row and then insert a new one in the sample place to achieve our result — we can simply call update on a row to replace displayed shopping item.
In other words, we want to calculate optimal insertions and deletions, but we don’t care about substitutions.
Smart table updating with diffing
With the diffing algorithm in our toolbelt, we can implement diffing-based table updating quite easily:
let changes = diffToAlign(old.map { $0.objectId }, new.map { $0.objectId })
let displayed = applyChangesToArray(changes, array: old)
table.applyChanges(changes, insertedRowType: "item")
for (i, (displayedModel, newModel)) in enumerate(zip(displayed, new)) {
let row = table.rowControllerAtIndex(i) as! ShoppingItemRow
row.update(from: displayedModel, to: newModel)
}
First, we diff the old and new arrays. Here I’m comparing them by the IDs of objects (shopping items) the view models represent. That’s partly for speed, partly because I want to maintain the logical relationship between rows and the underlying data. (You could, in essence, diff by the actual view models as long as they’re Equatable.)
Then, I’m applying insertions and deletions to the table, as well as to the old array (so that it continues to represent the displayed state).
Finally, I’m enumerating over the old and new view models and updating each row. Voilà!
Here’s an illustration of how this works in practice:

As you can see, the algorithm did the right thing — it moved “Cookies” to the top, and changed “Chocolate” to “Mayo” without sending any updates to other rows.
Generic table updating
Before we finish, let’s just spice up our code with generics, so we can move as much logic as we can to the framework layer.
First, we’ll define protocols for our updatable row controllers and the view models that describe them:
protocol TableRowModel {
typealias RowController: UpdatableRowController
static var tableRowType: String { get }
var objectId: String { get }
}
protocol UpdatableRowController {
typealias RowModel: TableRowModel
func update(from old: RowModel?, to new: RowModel)
}
Our code can now conform to them:
extension ShoppingItemRowModel: TableRowModel {
typealias RowController = ShoppingItemRow
static let tableRowType = "item"
}
class ShoppingItemRow: NSObject, UpdatableRowController {
func update(from old: ShoppingItemRowModel?, to new: ShoppingItemRowModel)
// ...
}
What’s the purpose of all this? It allows us to add this method to WKInterfaceTable:
func updateViewModels<T: TableRowModel where T.RowController.RowModel == T>(from old: [T], to new: [T]) { ... }
We can call it with a pair of ShoppingItemRowModel arrays, and the table will figure out the rest for us. If it needs to insert rows, it will check for T.tableRowType. When it retrieves row controllers, it will cast them to T.RowController. And because of the T.RowController.RowModel == T constraint, the compiler knows that row controller’s update method accepts our T view model.
Result and conclusions
Are you still hanging in there? Good, because the end result is encouraging. Our interface controller has been greatly simplified:
class ShoppingListApp: WKInterfaceController {
@IBOutlet weak var table: WKInterfaceTable!
var items: [ShoppingItem]
init() {
items = cachedShoppingList()
updateTable()
API.fetchShoppingList { newItems in
self.items = newItems
self.updateTable()
}
}
var displayedRows: [ShoppingItemRowModel] = []
func updateTable() {
let newRows = items.map { ShoppingItemRowModel($0) }
table.updateViewModels(from: displayedRows, to: newRows)
displayedRows = newRows
}
}
Think about this for a second. As far as the interface controller is concerned, its UI is a pure function of the shopping list data. The tricky logic of deciding how to go from the representation of UI to actual update commands has been delegated to the framework.
If your app allows users to manipulate presented data from the Watch, you no longer have to get your hands dirty trying to manually insert, remove or update the right table rows. Nor do you have to deal with the performance penalty of just updating the whole thing. It just works!
As a bonus, you can improve your performance even further by loading tables lazily, which I covered in a separate article: Lazy WatchKit tables. (Very easy to do if you use view model diffing)
Regarding watchOS 2
Since I published this post, watchOS 2 came out, allowing apps to run directly on the Watch. You might conclude that this makes this post obsolete and there’s no reason to implement the view model-based architecture in your app. I believe this conclusion to be false.
The architectural benefits of this approach still apply. Treating the UI as a function of application state makes your code cleaner and easier to reason about. There’s more complexity under the hood, but the application code is easier to manage.
Some optimizations, like the update(...) helpers aren’t needed anymore, but the diffing algorithm is still very useful. Although conceived as a performance trick, it has a side effect of nicely animating row insertions and deletions without you having to do anything. This is pretty awesome when you have changing lists of things coming from the network.
Try it out with your app!
Either way, I hope you’ve enjoyed this article, and if you’re interested in implementing these ideas in your app, check out the GitHub repo with the demo app, diffing code and WatchKit framework extensions: DiffyTables.
If you have comments, complaints or ideas for improvement, please let me know on Twitter or make an issue on GitHub.
Credits
These things gave me the inspiration and knowledge to write this post: Reducing WatchKit Traffic With View Models, React, Longest common subsequence problem, An O(ND) Difference Algorithm and Its Variations
Published May 29, 2015.
Last updated October 05, 2015.
Send feedback.